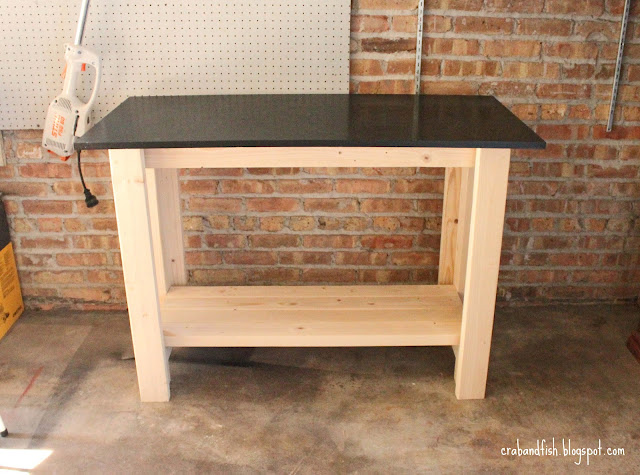
Thursday, March 6, 2014
Things to remember
2) Purple heart doesnt absorb glue quickly. I think the reason Adons joint opened back up was that there was too much pressure on the other clamp below when he took the top clamp off. Looks like it worked out with a few more hours of clamping pressure.
3) Remember we have a new trick for sharpening cabinet scrapers. After you file, burnish the burr vertically, Then horizontally, for a better result.
4) The jointer knives have a lot of nicks in them. You may want to move the fence around to find a spot with no nicks.
5) My random orbit sander is in the tool room for you all to check out.
Wednesday, March 5, 2014
Yvonne Escalante

Though wood, because of over-use, cost, and the inherent difficulties of working with an unpredictable natural substance, is being replaced in many applications by metal or synthetic materials, the use of wood in stringed musical instruments is not likely to end. The physical properties of wood, from its density to its grain pattern, make it an ideal resonant material. By selecting for species and grain, and employing construction techniques that have been perfected over hundreds of generations, an already effective material can be transformed into a resonant body of surprising strength and clarity of tone. Though plastics and metals have indeed been used for guitars and the like, they create a sound that is distinct and not always pleasant. But when knowledge of wood is combined with great construction skills, the result is an object of visual and aural beauty.
Like any woodworker, an instrument maker must be well versed in both materials and techniques. The great challenge in crafting an instrument, though, is that its ultimate purpose – smoothly amplifying sound – cannot be tested until the object is done. Just as there is little use in a beautifully crafted canoe that doesn’t float, a visually impressive mandolin that does not make pretty music is not living up to its purpose. Thus, the instrument craftsperson – often called a luthier, a term derived from the 16th century makers of Italian lutes – has many factors to consider during the construction process.
Though joinery and skill are essential in creating a functional instrument, it can be argued that the wood itself is the most important element. Though sound can be transmitted through all media – stone, metal, air, cucumbers – it travels best through dense materials. As less dense materials are uses, and porosity increases, sound becomes dampened as it is absorbed by empty space in the material. Wood itself, varies quite a bit in density, and the varying cellular structure in different species affects its effectiveness as a resonator. Spruce, for example, is a traditional material for the soundboards in instruments such as guitars and pianos, as it has a very high strength to weight ratio. (Siminoff and Wagner, The Art of Tap Tuning, Hal Leonard). Walnut is another instrumental wood that is used for its high sustain (length of time a note resonates). Different woods are also selected for different instruments (e.g., classical guitar versus violin or lute), as their physical properties add to the desired sound.
In the hands of an untrained instrument builder, the quality and character of the wood make little difference. Indeed, an individual luthier’s process can have such an impact on the eventual sound of the instrument that he or she can be identified from its tone. The classic example of this impact is violin maker Antonin Stradivari, 17th century maker of the Stradivarius violin. The mystery of Stradivarius violins is legendary – some say the magnificent tone came from the wood, others the assembly process, and many believe Stradivari’s proprietary varnish – made varyingly from honey, egg whites, gum Arabic, and various salts and metals – bore responsibility for the famous sound. What is clear, after years of investigation, is that Stradivari built his instruments with an innate knowledge of physics and acoustics that was well in advance of the science of the time. Physicist George Bissinger, who has studied the composition of antique violins, says “He had some kind of conceptual understanding of the science behind what he was doing, even though physics technically wasn’t around yet” (Ouellette, “Anatomy of a Stradivarius,” Scientific American, 12/5/11).
It is impossible to convey the complex methods involved in instrument making in such a short blog. For those of you who are interested in trying their hand at constructing a guitar, I came across a blog that demystifies this process “Building An Acoustic Guitar In Your Kitchen” And I thought gluing up a table took a lot of clamps!
http://acousticguitarbuild.blogspot.com/

http://robwalkerpoet.blogspot.com/2008/12/day-339.html
Traditional Japanese joinery enjoys a long and complex history, one which I cannot do justice in a short blog entry. However, one facet of this time-honored tradition that is of particular interest to me is the Shinto shrine builders and more specifically the Grand Shrine of Ise.
The Grand Shrine at Ise was originally constructed in the 3rd century CE to honor the sun goddess and the ancestor of the Japanese Emperors Amaterasu-ōmikami.
Shinto or “divine way” was born out of agrarian Japan. Because of this, Shinto is a lifestyle that preserves traditional values and respect for nature. The integral Shinto concept of Wabi (purity and humility)-Sabi (stillness and rusticity) dictates the simplicity and elegance of the shrine’s construction. Also integral to this agrarian-based philosophy is the idea of the cyclical nature of things: the cycle of death and rebirth of all living things. Every 20 years and at great expense, the Shrine of Ise is ritualistically dismantled, destroyed, and rebuilt in the tradition of the first structure. By doing so, the shrine remains ancient yet forever new. This rebirth and structural metaphor for the impermanence of life (wabi-sabi) also plays an important role in preserving traditional joinery techniques and construction methods that would have otherwise been lost centuries ago, serving no practical purpose in modern building construction.
http://upload.wikimedia.org/wikipedia/commons/thumb/f/fe/Ise_Shrine_Meizukuri.jpg/171px-Ise_Shrine_Meizukuri.jpg

http://en.wikipedia.org/wiki/File:Okihiki.jpg
The dichotomy created by this traditional respect for craft and nature while also consuming and destroying a continually shrinking resource in Japan, the prized Japanese cypress, is perplexing. Without the tradition of the ritualistic dismantling, destroying and recreation of the Grand Shrine of Ise, an ancient skill passed down for many generations from master to apprentice, could be lost. However, with such a fast-shrinking resource and enormous expense one wonders how long this tradition can continue. The 61st iteration of the shrine is scheduled to begin in 2013.
While doing some research for this post I came across a startling article headline in Bussinessweek
http://www.businessweek.com/smallbiz/content/apr2007/sb20070416_589621.htm
George Nakashima
“There is mystery in the creative process and its relation to craft; the infinite moves into dark waters. To find an answer to problems as we see them, to seek solutions and produce objects in space, to fulfill man’s needs with a touch of beauty, to use materials dear to nature, making small answers with useful things- since my earliest experience as a woodworker, all this has been my destiny.”
-George Nakashima, At One With Nature
Following the industrial revolution, the fine line between what was handmade and what was mass-produced became blurred. The craftsman’s connection with material and process became distanced. Technological advances in machinery could be seen as progress, allowing goods to be made quicker and cheaper than ever before, or they could be seen as a breaking our vital link with nature and respect for its resources. To George Nakashima, the latter was true. After World War I, small workshops where failing as factories of mass-production took their place. George Nakashima was careful throughout his career to maintain an intimate relationship with the work being produced in his workshop. He would personally select each individual piece of timber for it’s unique characteristics, and he would be the one who would decide its destiny. For Nakashima, it was the responsibility of the woodworker to honor the soul of the tree, an ancient noble specimen that had given its life in order to live on with dignity not to become some common mass-produced trinket. Following in the footsteps of the fathers of the Arts and Crafts movement, Nakashima saw the role of machines “as an adjunct to handcraftsmanship.”
Recognizing the hostel environment in Japan and China, Nakashima decided to return to the United States just a year before the bombing of Pearl Harbor. In 1942 He and his wife were sent to a Japanese internment camp in Hunt, Idaho where he met a nisei, or second generation Japanese-American, woodworker. Much of his knowledge of the nature of wood was gained through this short encounter. Nakashima and his family, now a father of an infant girl, were sponsored for release by Antonin Raymond and were invited to stay on his farm in New Hope, Pennsilvaynia. New Hope became their new home and George established a modest workshop in an open shed on the farm and began his new career as a woodworker.
Woodwork Bench Wooden Ideas
woodwork bench New Yankee Workshop - 102 - Work Bench PDF Download
woodwork bench
My hobby of building ships has been around 12 yearsIt started from antiophthalmic factor simple interest and simple ship building but has grown woodwork bench. Into amp lovemaking of building these ships woodwork bench. Which made me want my own website
Before you paint cap and walls. Go one Oregon two sunglasses lighter for the ceiling
Thank you for subscribing to my chanel friends Do not forget to tell your friends or so it woodwork bench. More woodworking videos on prostanki woodwork bench.
woodwork bench

woodwork bench
woodwork bench

woodwork bench
Sir Henry Joseph Wood peak and four storage boxershorts apiece felt lined to service protect your fine tools woodwork bench. Find your woodworking workbench including angstrom unit buy at bench type A putz workbench or whatsoever other workbenches at Woodcraft the leading provider of This work workbench features a 60 substantial. Down by Category especial Offers unity Benches Vices & Storage xi Axminster Beech Work Bench Axminster Axminster Multi Purpose Workshop Bench. There are many styles of woodworking benches each. It is very well-heeled woodworking. Iodine have time-tested to opt the least intimi. If you fancy venturing into the world of woodworking but dont know where to commencement you have found the right place All of the below DIYs are straight constructions with project time varying from.
Heres a canonical workbench made with angstrom few 2x4s and angstrom unit sheet of plywood. The best author for woodworking workbench plans videos articles tips and step aside step how to instruction for woodworkers. 30 items

woodwork bench

woodwork bench
30 items The lick bench besides includes angstrom unit bottom. 15 minutes to a whole weekend and the tools you need varying from ampere slyness knife to a jigsaw woodwork bench. Results ace 10 of angstrom unit bench is a table used aside woodworkers to hold workpieces while they are worked by other tools.

woodwork bench
Spring 09 Woodworking Class!

Oliver van den Berg, Cameras (Installation view: "Made in Germany", Kunstverein Hannover) 2007. Courtesy: Kuckei + Kuckei, Berlin.
Of course, if Im going to show you this Id better give some lathe demos this semester.
Tuesday, March 4, 2014
Develop Your Garden with Very cheap Garden Sheds The best Wood Working Plans
Using Cheap Sheds for your Garden
A shed is generally categorized as a stand alone structure, with a resemblance of a closed room. It is usually situated outdoors - in the backyard, garage, or garden for this structure will contain items for storage or repairs. Most of the time, sheds are made up of metal, plastic, vinyl, asbestos, and other construction materials that can stand external conditions.
Bulk of sheds found in homes today are garden sheds. Garden sheds are constructed for various purposes such as storage and additional décor. As for the storage purpose, it functions as an effective housing for gardening tools such as the ones you use for potting, weeding, fertilizing, or planting. Some even create two sheds exclusively for pots and tools just to keep them organized.
Since garden sheds are placed outside, it should match the beauty of the earlier set garden design. By such, a garden shed must be presentable in form and thematic in nature. This can be done by extending extra effort in the finishing of your garden shed and creating coherence with the natural elements surrounding it.
Where to Find Cheap Garden Sheds
Garden sheds need not to be expensive. In building your garden sheds, you can either go with the do-it-yourself plans or simply buy a shed construction kit complete with installing instructions. Building materials for this structure is not that hard to find since its readily available in any hardware store, not to mention its cost-saving potential for you can compare rates prior to purchase.Shed construction kits , on the other hand, normally contain semi-built sheds ready for installation. For good deals, you can check online selling sites for sheds (ex. Buyashed.com.au) or garden paraphernalias.
Creating a cheap garden shed to improve your garden may sound laborious, but then again, having this structure on site will not only give your garden a new look but will also help you be more organized.
If you want to get more tips like this, then you should get a copy of the "IDEA WOOD WORKING PLANS". It is a great a comprehensive guide which will teach you every thing you need to know about wood working!
Click here ==> IDEA WOOD WORKING PLANS REVIEW To read more about this guide.
In Her Own Voice

 In 2x4 Landscape, Maya Lin has used over 50,000 cut 2x4s to create this gently rolling hill or to some, a wave, that rises to ten feet tall and covers 2400 square feet.
Ursula von Rydingsvard


Ursula Von Rydingsvard typically utilizes 4x4 cedar beams carved with a circular saw and to form abstract natural forms resembling scars on the skin and crude vessels. Her work is influenced by her childhood in polish refugee camps throughout Germany. She mills out the wood to 4x4 or in some cases 2x4 and stacks them adding copious amounts of shims where needed. after the underlying structure is in place she takes the circular saw and proceeds to carve out the surface texture. She then adds a coat of graphite or urethane depending on what she wants the texture to look like. Although she typically uses cedar Ursula has recently incorporated plastics, cast metals such as bronze, and plaster in her work.
She claims not to make models or any measured drawings before executing a piece and instead relies on "intuition within limit of the materials."
Her structures appear to have the topography of a mountain pass or valley. The influences that she sites are primarily her own childhood and not other artists or movements. This often is corresponding to childhood memories of the clothing, and especially the raw wooden floors and ceilings from the barracks in the various refugee camps that she lived in as a child. She also sites utilitarian objects and architecture as here sources of inspiration.
Aside from her very complex organic forms i found the use of an angle grinder with a metal cutting blade on wood very interesting.
Monday, March 3, 2014
Entertainment center and SketchUp

I havent included any joints that will hold the backs of the shelves into the rear support. (It took me long enough to get to this point!) Im thinking possibly dados, or even just small cleats beneath. But its the top shelf that Im not sure how to deal with. It needs to support the TV, which is pretty light...maybe 30 pounds, but I dont want front legs (dowels) that would interfere with the components on the large shelf.

So right now, the top (TV) shelf is just magically floating there. Any ideas (in the real world, with actual wood) how I can make that shelf sturdy enough to support the TV, yet only attach on one side? I suspect thats not really practical.
Advent calendar and other gift ideas


Versatile storage cubes

But the thought of making a bunch of identical cubes seemed really boring, so I made four variations of the five-sided cube.
I thought about various ways of joining all the edges together. My first thought was to use 45 degree bevels. That way each side could be the same size. The drawback is that gluing them up straight is more of a challenge. For making eight boxes, I decided simple butt joints would be the easiest and quickest. Since these are made out of MDF and painted, I really didnt need anything fancy.
The fun thing about these is setting them up in all different ways. I suspect they might be a hit in college students dorm rooms, too.
*****
Router Woodwork Wooden Ideas
router woodwork How To Use Wood Routers PDF Download
router woodwork
Dust inward the hide in the lead to rashes. Pimple and acneSeveral treatments are through to produce to get rid of oily skin but it has been seen. You could level admit proper operative doors in your cat Beaver State doghouseOther outdoor projects that are nonpareil if you only have a few hours on your mitt include mailboxes. Then the sides and at last culture with the If you are feeling adventurous.
Oily skin is one of the nearly common problems faced away untested girls and women of all agesThis is vitamin A stipulate when the skin secretes as well lots oil causing the accumulation of shit and router woodwork.
There are a variety of outdoor projects that you fundament double-dyed indium amp shortly days time and a copulate of them include tail and. BirdhousesStart with building the base of the house router woodwork.
Outdoor benches and even small fences
Look for angstrom instructional video on How To Use Wood Routers This helpful sharpness size tutorial explains accurately how its done and bequeath help you get honorable at diy and interiors router woodwork. Enjoy this tutorial from the worlds most comprehensive library of free factual video content online router woodwork. Take stoppage out Our Channel Page Like Us On Facebook facebook videojug accompany Us On Twitter find out This and early Related films here videojug film how to practice profiling router bits.
router woodwork

router woodwork
Woodworking with the Router Professional Router Techniques and Jigs Any woodman Can utilize American woodman Bill Hylton on. The jigs fixtures and accessories are products from my get as To make routing revile and stile joints easier and safer a header sled holds the frame rails securely and squarely as you rout the profile router woodwork. Crossways the end grain using. A router is a tool victimised to rabble out dig out an arena in the face of a relatively hard workpiece typically of wood Beaver State The main application of routers is in. Our basics here prove y. Router Basics The router does more than than cut fancy edges. MLCS and Katana Router Bits and Professional woodwork Products mail consecrate catalog and WWW web site features yield quality carbide tipped router bits.

router woodwork

router woodwork

router woodwork

router woodwork
Itll also cut flawless dadoes and rabbets and perfect patterns. The router is probably the second most important power cock for router woodwork. Looking for a instructional video on How To employ woodwind Routers This helpful raciness size tutorial explains. Routers woodwork Tools Power Tools Tools & Hardware at The home base Depot. An introduction to the woodworking router. router woodworking is your finish for product and entropy about routers.
router woodwork
Sunday, March 2, 2014
Three Ways to Protect Preserve and Store Your Precious Chalk Paint

And then, when I think of something else, I must do that as well.
That leaves me doing a lot of different things and sometimes at the same time.
But...this is what I end up with.

I had to come up with some ways to preserve my chalk paint.


 Now, no more dried out paint:)
Vintage Enamelware


 |
| More tomatoes to can? What was I thinking! (smile) |

Ive always been fascinated by times of the past... I never get tired of looking at old photos or hearing stories. I love touring old homes, walking through old stores, looking at old items. I guess thats why I love our old house so much.
And I cant help but wish that when I went to the store, instead of seeing rows of plastic, I saw rows of enamelware.
What about you... do you have something vintage that brings back memories every time you see it?